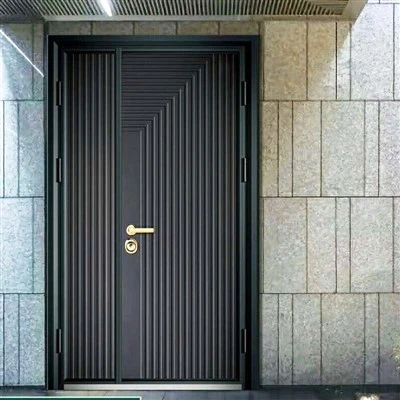
Hey there! As a supplier of Full Panel Type Aluminum Courtyard Door, I've seen firsthand how crucial proper alignment is during the installation of these doors. A well-aligned door not only enhances the aesthetic appeal of your courtyard but also ensures smooth operation and long-term durability. In this blog post, I'll share some tips and tricks on how to ensure the proper alignment of a full panel type aluminum courtyard door during installation.
Pre-Installation Preparation
Before you start the installation process, it's essential to do some pre-installation preparation. This includes measuring the door opening, checking the levelness of the floor and walls, and gathering all the necessary tools and materials.
Measure the Door Opening
Accurate measurements are the key to a successful installation. Use a tape measure to measure the width and height of the door opening at multiple points. Make sure to measure the opening at the top, middle, and bottom to account for any variations. Record these measurements and compare them to the dimensions of the door you've purchased. If there are any discrepancies, you may need to make adjustments to the door or the opening.


Check the Levelness of the Floor and Walls
The floor and walls where the door will be installed should be level and plumb. Use a spirit level to check the levelness of the floor and walls. If the floor or walls are not level, you may need to make adjustments using shims or other leveling materials. A level installation surface will ensure that the door hangs properly and operates smoothly.
Gather the Necessary Tools and Materials
Having the right tools and materials on hand will make the installation process much easier. Some of the tools you'll need include a drill, screwdriver, level, tape measure, and shims. You'll also need the door itself, hinges, screws, and any other hardware that came with the door. Make sure to read the installation instructions carefully and gather all the necessary tools and materials before you start.
Installation Process
Once you've completed the pre-installation preparation, it's time to start the installation process. Here are the steps to follow:
Step 1: Position the Door in the Opening
Carefully lift the door and place it in the opening. Make sure the door is centered in the opening and that there is an equal gap around the perimeter of the door. Use shims to hold the door in place and keep it level.
Step 2: Check the Alignment
Use a level to check the alignment of the door vertically and horizontally. The door should be plumb (vertical) and level (horizontal). If the door is not aligned, adjust the shims until the door is level and plumb.
Step 3: Mark the Hinge Locations
Once the door is properly aligned, use a pencil to mark the locations of the hinges on the door frame and the door itself. Make sure the hinge locations are evenly spaced and that they align with the holes in the hinges.
Step 4: Install the Hinges
Using a drill, make pilot holes in the marked locations on the door frame and the door. Then, attach the hinges to the door frame and the door using screws. Make sure the hinges are securely attached and that they operate smoothly.
Step 5: Recheck the Alignment
After installing the hinges, recheck the alignment of the door. The door should still be plumb and level. If the alignment has changed, adjust the shims until the door is properly aligned.
Step 6: Install the Latch and Lock
Once the door is properly aligned and the hinges are installed, it's time to install the latch and lock. Follow the manufacturer's instructions to install the latch and lock on the door and the door frame. Make sure the latch and lock operate smoothly and that they secure the door properly.
Step 7: Test the Door
After installing the latch and lock, test the door to make sure it opens and closes smoothly. Check the alignment of the door again to make sure it hasn't changed during the testing process. If the door doesn't open or close smoothly, adjust the shims or the hinges until the door operates properly.
Post-Installation Checks
Once the door is installed and tested, it's important to do some post-installation checks to ensure that everything is working properly. Here are some things to check:
Check the Door Operation
Open and close the door several times to make sure it operates smoothly. Check for any binding or resistance when opening or closing the door. If the door doesn't operate smoothly, adjust the shims or the hinges until the door operates properly.
Check the Seal
Check the seal around the perimeter of the door to make sure it is tight and secure. A good seal will help to keep out drafts, moisture, and pests. If the seal is not tight, adjust the door or the weatherstripping until the seal is tight.
Check the Security
Test the latch and lock to make sure they secure the door properly. Try to open the door from the outside without using the key or the latch. If the door can be opened easily, adjust the latch or the lock until the door is secure.
Troubleshooting
Even with careful installation, you may encounter some problems with the alignment of the door. Here are some common problems and solutions:
The Door is Not Level
If the door is not level, adjust the shims until the door is level. You may need to add or remove shims at different points around the door to achieve the proper level.
The Door is Not Plumb
If the door is not plumb, adjust the shims until the door is plumb. You may need to add or remove shims at different points around the door to achieve the proper plumb.
The Door is Binding
If the door is binding when opening or closing, check the alignment of the door and the hinges. Make sure the door is level and plumb and that the hinges are properly installed and adjusted. You may need to loosen or tighten the hinge screws to adjust the alignment of the hinges.
The Door is Not Sealing Properly
If the door is not sealing properly, check the weatherstripping around the perimeter of the door. Make sure the weatherstripping is in good condition and that it is properly installed. You may need to replace the weatherstripping if it is damaged or worn.
Conclusion
Proper alignment is essential for the installation of a full panel type aluminum courtyard door. By following the tips and tricks outlined in this blog post, you can ensure that your door is installed correctly and that it operates smoothly for years to come. If you have any questions or need further assistance, don't hesitate to contact us. We're here to help you with all your Full Panel Type Aluminum Courtyard Door needs.
In addition to full panel type aluminum courtyard doors, we also offer Double Size Aluminum Art Courtyard Door and Royal Style Swing Aluminum Courtyard Door. These doors are designed to enhance the beauty and functionality of your courtyard. If you're interested in learning more about our products or would like to discuss a potential purchase, please feel free to reach out to us. We're always happy to help you find the perfect door for your needs.
References
- Aluminum Door Installation Guide, Manufacturer's Manual
- Home Improvement Resources, Online Articles